Digital Masters Magazine

Mastering Digital Arts for Web, Video, Mobile, you name it

  • Design
  • Coding
  • Interactive
  • Mobile
  • Video
  • Web
  • PostsComments
Home Miscellaneous How to Undo the Last Mishap or Two: Using Restore Points, Your Time Machine in Windows
How to Undo the Last Mishap or Two: Using Restore Points, Your Time Machine in Windows

admin January 24, 2016 Leave a Comment

How to Undo the Last Mishap or Two: Using Restore Points, Your Time Machine in Windows

Perhaps the best way of ensuring that Windows 10 can revert to operating smoothly even when disaster strikes (such as a failed update) involves creating restore points in advance. Relax, it’s painless and easy.

Nothing is as smooth and painless like rolling Windows 10 back to a previously created restore point.

Creating a restore point

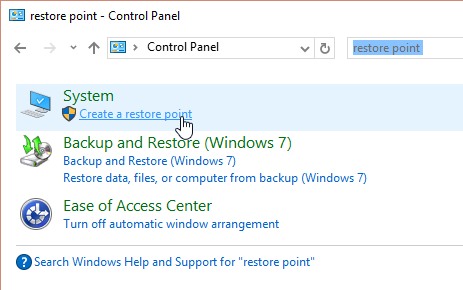
Step 1. Access System Properties throught the Control Panel

Open Control Panel. Search for the keyword “restore point”. Once results are shown, click on Create a restore point. (This will open the dialog System Properties on the tab System Protection.)

Windows 10: create a restore point
Step 2. Activate system protection

In the dialog System Properties on the tab System Protection, click Configure.

In the following dialog, activate the option Turn on system protection in the section Restore Settings. In the section Disk Space Usage, use the slider to set the maximum disk space you want to allow, then hit Apply. Click on OK to close the window.

Repeat this step for each of the available drives you want to protect by selecting it from the list and using the Configure button to manage disk space use.

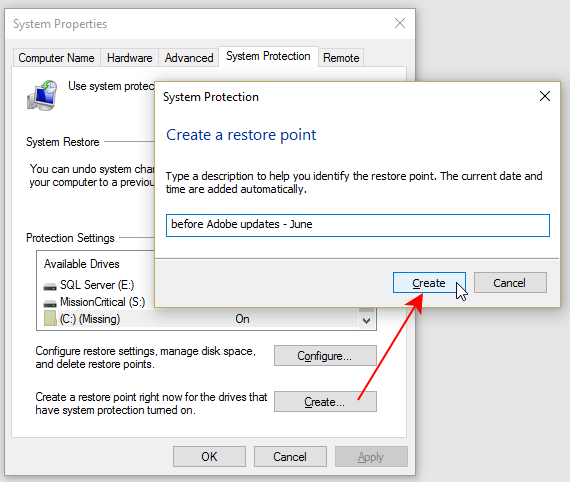
Step 3. Create a restore point

Back on the tab System Protection in the dialog System Properties, click on the Create button, name the restore point, and confirm. Wait for the process to complete.

Windows 10: create a restore point

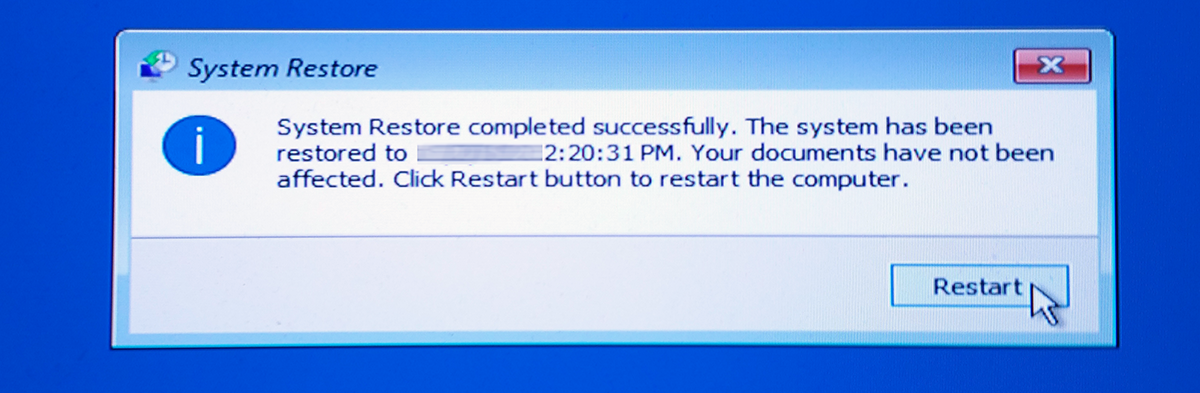
Should you ever run into trouble with your PC, you can now revert to this restore point using the System Restore feature as described in this post.

Windows 10 successfully restored to a previously created restore point


Filed Under: Miscellaneous Tagged With: data security, Windows 10, Windows Control Panel

Leave a Reply Cancel reply

Your email address will not be published. Required fields are marked *

Recent Posts

  • Understanding Color Profiles: How to Properly Use Color Management Features in Adobe Photoshop CC to Make Your Work Stand Out
  • How to Undo the Last Mishap or Two: Using Restore Points, Your Time Machine in Windows
  • How to Repair Windows 10 to a State of Sparkling Awesomeness: Recover from Crashes, Restore, Reboot
  • Designer, Meet Your Coder, and Other Ways to Make Money in Your Creative Pajamas
  • WordPress Migration the Easy Way: with the All-in-One WP Migration Plug-In

Categories

  • Admin Stuff
  • Coding
  • Design
    • Adobe Fuse
    • Adobe Photoshop
  • Desktop
  • General
  • Interactive
  • Miscellaneous
  • Mobile
  • Security Alert
  • Tip of the Day
  • Video
  • Web
    • E-Commerce
  • WordPress

What’s up

Adobe Adobe CC AJAX Amazon Amazon FPS Apache APIs Apple Authorize.net checkout crash CSS3 Dreamweaver e-commerce eshops event log Event Viewer Facebook Finder Flash gateways Google HTML 5 iOS JavaScript Mac MAMP merchant mobile OS X payment payments PayPal Photoshop PHP RSS security security certificates shopping cart timesheets virtual hosts WAMP web shop Windows 8 Windows 10

RSS

 Subscribe in a reader

Speed, reliability and elegance for up to 256GB USB 3.0 storage on a stick

Windows 10 ready

  • Home
  • Subscribe
  • Archive
  • Advertising
  • Contact Us